Showing posts with label cooking. Show all posts

Saturday, December 19, 2009

Holiday Baking

She's finally been takin' out for her first spin...


Yes, it's official. After being terrified to turn it on for six months, I used the glorious pink KitchenAid stand mixer for the first time today to make several different kinds of holiday cookies. It's kind of intimidating, no? Okay, maybe I'm the only one, but it's like super expensive and heavy as all get out, so I was always a wee bit nervous that I was going to break it or something. So I just let it sit on my counter and shine in all it's pretty pinkness.

Well her cushy days of just being counter candy are over! Baby works like a charm! In fact I spent so much time baking this morning, that Tally finally got bored of wandering around my feet and decided to curl up in a safe place (just in case things went haywire in the kitchen).

The results of all my hard work today? A couple batches of Fudge Crinkles, a family recipe called Sweet Treats, and possibly my new favorite: Fake-Out Starbucks Cranberry Bliss Bars...

I'll admit, they aren't quite the same as the real ones (the blondie base is thicker than the ones you'll get at Starbucks), but the flavor and taste is super similar, and I think, quite delicious. My mom found the recipe here, and even though they take some time and effort, they're way worth it. (Mine obviously don't look as pretty as those in the recipe photo, but give me a break - this was the first corner piece that's always a pain in the booty to get out of the pan!).

More recipes to come - I have Monday off of work, so I'm going to try to get some fudge made, and NavyGuy will absolutely die if he doesn't have his Peanut Butter Chocolate Wheat Thins.

What Christmas cookies are your favorites? Does anyone have all their baking done?

Read more...

Monday, November 16, 2009

Turkey Day Prep

Sunday night, I did a Thanksgiving test-run of the new recipes for this year (excluding the turkey). It was a slightly unusual menu...

Cocktail Weiners*

First Crock Pot Adventure

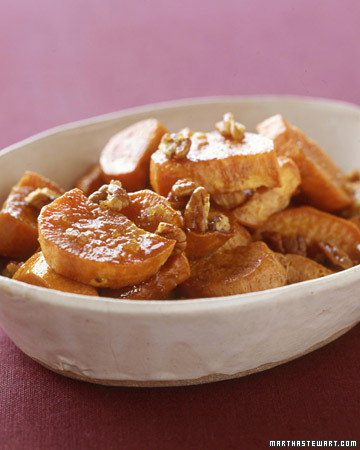
Butter-Pecan Sweet Potatoes


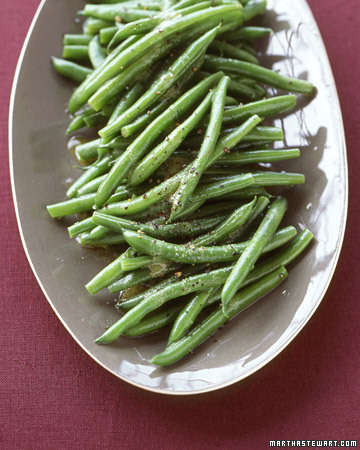
and Green Beans with Vinaigrette

Two of the three were hits. The cocktail weiners were fabulous (and the crockpot that Sister got us for the wedding works great!). NavyGuy loves sweet potatoes, and I didn't have them at T-Day last year, so I had to figure out an easy recipe so they could be on the table this year. Martha didn't disappoint - the butter, brown sugar, and pecan pieces were delicious with the already yummy sweet potatoes.

I'm on the fence about the beans though. The vinaigrette just doesn't have much flavor to it, so I think I'm going to keep looking. Any suggestions? Most of the other dishes I have planned are rich and heavy, so I'm hoping to keep the green beans fairly light.

*The cocktail weiner recipe I used came from a Fond du Lac cookbook. The sauce calls for 2 cups ketchup, 1 T of worcestershire sauce, and 1 cup light brown sugar. I used turkey weiners to make them a teensy bit less fatty.

Read more...

Saturday, September 19, 2009

Tasty Treat

Pink baking goodness.

Making muffins

One pink bowl, two pink bowls, three pink bowls! (And a pink spatula for good measure.)

This bread mix was a wedding shower gift; I opted to make muffins as an attempt at better portion control.

Raspberry Almond Crisp Muffins

Yum!

Muffins

Muffins, good. Pink muffins, goooooood.

Read more...

Saturday, September 5, 2009

Recipe: Penne al Fresco

We received a cool Pampered Chef dish as a wedding present, and I tested it out tonight with a recipe that came along with the dish.

I'm fairly certain you could use any microwave safe cook dish to make this recipe.

Penne al Fresco

- 4 cloves of peeled chopped garlic
- 2 cups grape or cherry tomatoes
- 3 cups uncooked penne pasta
- 3 cups chicken broth
- 3/4 cup dry white wine (I used a $4 bottle of chardonnay)
- 1 1/4 cups lightly packed chopped basil
- 1/4 cup grated Parmesan cheese

1. Spray whatever cooking dish you're using with non-stick cooking spray. Microwave the garlic and tomatoes on high (covered) for 2 minutes, then stir. Cook for another 3 minutes until the tomatoes have "popped."

2. Crush the tomatoes and add pasta, broth, wine, and a pinch of salt and pepper. Cover and microwave on high for 16-18 minutes, stirring after 10 minutes.

3. Add the basil and cheese, saving a little of each for garnish if you're fancy like that.

Voila! Fancy pasta, and some leftover wine to pair with it ;) The original recipe says you can include grilled chicken, which I'm sure would also be tasty. I think I should have added more pasta to ours because there was a good amount of liquid still in the dish after cooking, but I just served it using a slotted spoon and no one was the wiser!

Read more...

Wednesday, July 1, 2009

Crazy for Chicken Salad

I'm nuts for chicken salad. There are a thousand different varieties with countless combinations of fruits, veggies, nuts, and flavors. I'm a fan of any version, but this was the first time I attempted to create my own. NavyGuy (who claims he hates chicken salad) gobbled his up. I used my "Busy Family Cookbook" as inspiration and altered two different recipes to come up with tonight's dinner.


Chicken Salad Croissants
- 2 cups cooked shredded chicken
- 1 cup halved seedless red grapes
- 1/2 cup sliced celery
- 1/4 cup sliced green onions
- 3/4 cup mayo
- 1 teaspoon lemon juice
- 1/4 teaspoon salt
- croissants
- lettuce leaf (optional)

In a large bowl, combine the chicken, grapes, celery, and onions. In a separate smaller bowl, mix the mayo, lemon juice, and salt. Drizzle the mayo mixture over the chicken, etc.; stir well. Pile on a cut croissant and devour.

Just fabulous! Of course, adding a croissant pretty much makes everything wonderful, but this would even be good without it. I'm excited to try another version in the future - I've seen recipes that include green apples, pecans, and all kinds of other tasty things. What do you go crazy for in your chicken salad?

Read more...

Wednesday, June 10, 2009

A Recipe and Cricut Update

I'm trying to work my way through all of the new cookbooks I received at various bridal showers in the past months. Tonight's test-run comes from my MOH who got me the California Pizza Kitchen Family Cookbook, as part of a "pizza time" themed gift. The cookbook has way more than just pizza though - it's got many of the awesome appetizers, salads, sandwiches, and other menu items they have at the restaurant.

Tonight I tried their "Grilled Chicken Pesto Panini." It was phenomenal. Seriously. Many of the ingredients I wouldn't eat separately, but when you combine them with bread and heat, it's magic. The recipe is below, along with my notes afterwards:

Grilled Chicken Pesto Panini
-Crusty Italian Bread
-2 T mayo
-1 medium leaf fresh basil (finely chopped)
-1 small clove garlic (finely minced)
-sun-dried tomatoes in olive oil
-Grilled Garlic Chicken (see additional recipe below)
-Monterey Jack Cheese (4 slices)

Heat your panini grill (or regular frying pan). Coat one side of each piece of bread with either butter or non-stick cooking spray. Combine the mayo, garlic, and basil, and spread over the "inside" of the bread. Place the tomato strips on the bread. Slice the cooked chicken and heat in the microwave for 20 seconds (so that everything is nice and warm when you eat it). Add the chicken to the sandwich, and top with the cheese slices. Cook on the panini maker or frying pan, and enjoy.

There are two prep things you need to do before assembling the sandwiches: make the grilled garlic chicken and the pesto mayo. The mayo is simple, and I assembled it early. I had run out of fresh garlic, so I used half as much garlic powder instead, and two basil leaves (I know - I'm wild!). This is my new favorite condiment - yum.


For the grilled chicken, CPK suggests a marinade ahead of time. Take your chicken breasts (or you can just use the pre-cut chicken you buy in bags at the store), and mix with 6 T of olive oil, 2 T chopped garlic, 1 T soy sauce, and 1.5 teaspoons of kosher salt. Put that mixture (I just threw it all in a plastic bowl) in the fridge for at least thirty minutes, so the chicken can soak up all the tasty garlicky-ness. If you're using raw chicken breasts, you need to cook them fully before adding them to your sandwich; if you're using pre-cooked chicken, you can either heat it in the microwave like the recipe suggests, or do as I did, and heat it in a frying pan with all the oil and garlic to really sear in the flavor.

It's more time and effort than a basic PB&J, but dang, it is sooooo worth it.


So that was the good news of the day. Also, the fact that I go my Social Security business dealt with, and in 5-7 business days, I'll have a new card with my new name. It was a little jarring to hand over my old card and watch the clerk casual throw it in the office shredder - bye bye Miss NavyGirl... no going back now!!! But, it's also exciting, cuz I got to sign my new name on a couple forms!

And the bad news... stupid stupid JoAnn Fabrics in Mt. Vernon didn't have any - ANY - Cricut cartridges. So no new toys for me to play with tonight. Oh, I found some other scrapbook supplies, but it just wasn't the same. :(

Ed. I have no clue why the fonts and sizes are all wonky on this post; something rotten in the state of blogger apparently.

Read more...

Wednesday, April 15, 2009

Party Time!

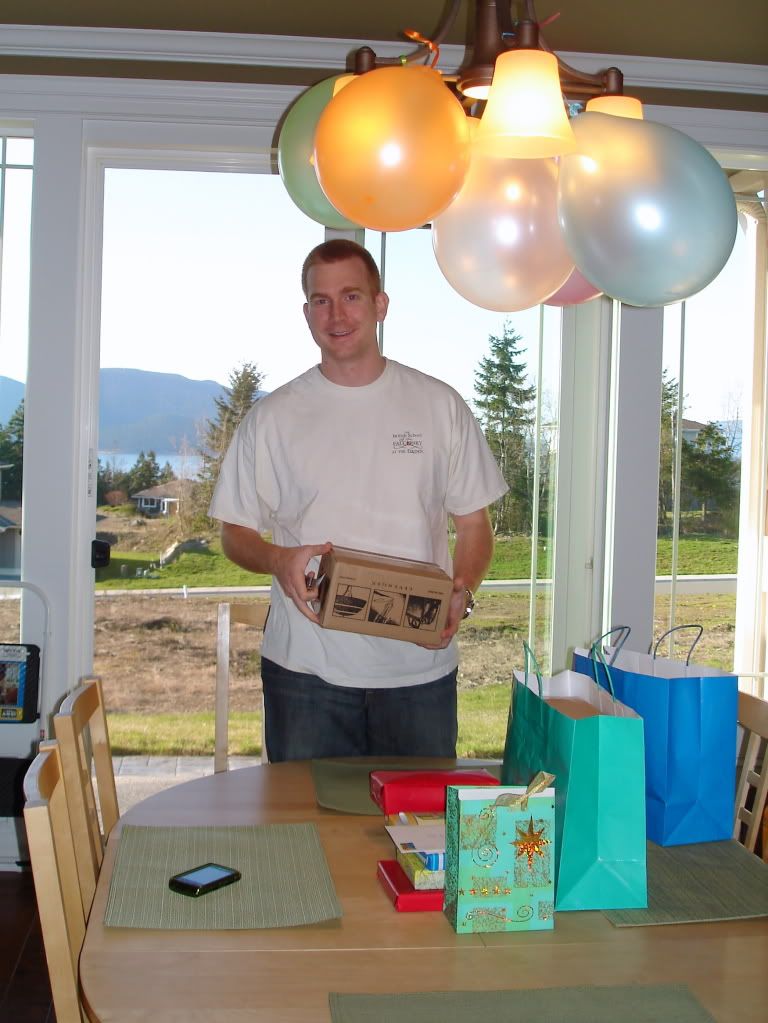
In celebration of NavyGuy's 27th birthday (I know - isn't he old?), we had Roomie #1 and another good Navy friend join us for dinner, cake, and presents. Sadly for NavyGuy, he had to do most of the cooking on his own birthday!

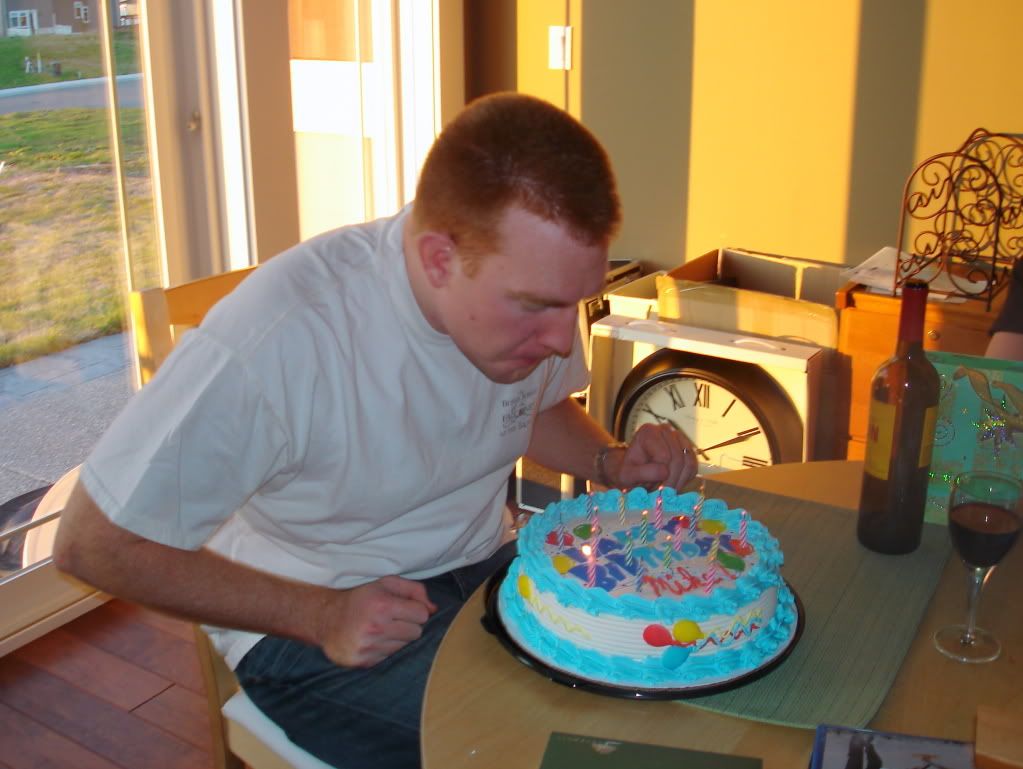
The menu was steaks and potatoes on the grill (see potato recipe below), Caesar salad, rosemary bread, and...... Ice Cream Cake! (Lucky for NavyGuy, I did not take a photo of him once he devoured his piece of cake - his lips and tongue were stained scary blue from the frosting.)

Awww... he looks so happy to be celebrating! Now make a wish...
Yeah, he definitely spit a little bit on the cake. We ate it anyway. It was ice-creamy good.

Campfire Grilled Potatoes
Spray aluminum foil with Pam (liberally) and then layer sliced potatoes. Add shredded cheese and chopped onions. Season with salt and pepper. Cover the potato mound with another sheet of aluminum foil and pinch all of the sides together to make a giant pouch. Then, cook on the grill for about 40-45 minutes (depending on the amount of 'taters), flipping pouch a couple times.

Read more...

Tuesday, March 17, 2009

Happy St. Patrick's Day

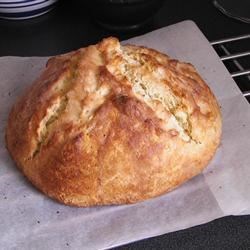
I may not ride the corned beef and cabbage train, but I do rock a great Irish Soda Bread recipe :)

This is my second annual loaf after Historygirlie convinced me I could probably tackle this one without much disaster inspired me with her version a few years back. NavyGuy tasted this year's version and declared it a winner!

Amazingly Easy Irish Soda Bread

- 4 cups all-purpose flour
- 4 tablespoons white sugar
- 1 teaspoon baking soda
- 1 tablespoon baking powder
- 1/2 teaspoon salt
- 1/2 cup margarine (or butter), softened
- 1 cup buttermilk
- 1 egg

- 1/4 cup butter, melted
- 1/4 cup buttermilk

1. Preheat oven to 375 degrees F (190 degrees C). Lightly grease a large baking sheet.


2. In a large bowl, mix together flour, sugar, baking soda, baking powder, salt and margarine. Stir in 1 cup of buttermilk and egg.

3. Turn dough out onto a lightly floured surface and knead slightly. Form dough into a round and place on prepared baking sheet.

4. In a small bowl, combine melted butter with 1/4 cup buttermilk; brush loaf with this mixture. Use a sharp knife to cut an 'X' into the top of the loaf.


5. Bake in preheated oven for 45 to 50 minutes, or until a toothpick inserted into the center of the loaf comes out clean, about 30 to 50 minutes. You may continue to brush the loaf with the butter mixture while it bakes.


Mine cooked up in 35 minutes, but it's definitely something you need to check every 5 minutes once you're past the 30 minute mark. I brushed it with the buttermilk/butter mixture twice while it cooked, and it keeps the bread much moister. This is a very dense bread, and can get dry if you overcook it; if you're worried about that, set the oven temp a little lower and cook for a bit longer.

Read more...

Sunday, March 8, 2009

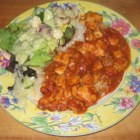
Recipe: Tomato Curry Chicken

We have a couple new recipes on the menu for this week (yes, I've started planning weekly menus... I've become boring and old and practical and too lazy to go to the grocery store eight three times a week). First up tonight was a variation on curry chicken. NavyGuy would eat aluminum foil if it was seasoned with curry, so I was fairly confident that this recipe would be a winner.

Tomato Curry Chicken Ingredients:

  • 4 skinless, boneless chicken breast halves
  • 2 tablespoons butter
  • 1 onion, chopped (I used about 3/4 of a small onion)
  • 2/3 cup beer
  • 1 (10.75 ounce) can condensed tomato soup
  • 1 teaspoon curry powder
  • 1/2 teaspoon dried basil
  • 1/2 teaspoon ground black pepper
  • 1/4 cup grated Parmesan cheese
Directions:
  1. Preheat oven to 350 degrees F (175 degrees C).
  2. Place chicken in a 9x13 inch baking dish. Melt butter in a medium skillet over medium heat. Saute onion, then stir in beer, soup, curry powder, basil and pepper. Reduce heat to low and simmer for about 10 minutes, then pour over chicken.
  3. Bake at 350 degrees F (175 degrees C) for 1 hour; sprinkle with cheese for last 10 minutes of baking.
I followed the directions exactly as they're written, and it was delicious! I love that it takes a little bit of prep ahead of time, but then you just shove the dish in the oven and essentially leave it alone for an hour. I served it over white rice. You could also serve it with couscous, which would soak up the extra sauce quite nicely. Let me know if you try it and have success!

Just a quick Happy Sunday Night card! The image is from Stampin' Up Pocket Silhouettes.

Read more...

Tuesday, February 17, 2009

Recipe: Easy Clam Chowder

NavyGuy is crazy - CRAZY - about clam chowder. He snaps it up whenever it's the soup d' jour at a restaurant, but at home when he has a craving I tend to pacify him with the canned version.

Tonight I tried a semi-homemade variety. Success! Here's an easy version you can try:

Ingredients
- 1 can cream of potato soup
- 1 can cream of celery soup (I got the low sodium ones)
- 1 1/2 cup milk
- 1/2 a stick of butter
- 1 C of chopped clams (I used just one small can and it was plenty)
- salt and pepper

Melt the butter in a pan, then add the other ingredients, giving them time to warm up. Once you've added the milk be careful not to let it boil.

That's it! We had some sourdough bread along with it and it was a grand little Tuesday night dinner.

Read more...

Tuesday, February 3, 2009

Recipe: Wisconsin Chili

With the cold and ickiness last week, it was the perfect time for chili. NavyGuy and I prefer the Wisconsin version (with macaroni noodles!) and I've shared the recipe below...

Wisconsin Chili
- 1 T vegetable oil
- 1 to 1.5 pounds ground beef
- 1/2 C chopped onion
- 1 packet of chili mix seasoning
- 1/2 C water
- 1 can (14.5 oz) diced tomatoes undrained
- 1 T brown sugar
- 1 C uncooked elbow macaroni

Directions
1. Heat oil in skillet. Brown beef and onions.
2. Add chili seasoning mix, water, tomatoes, and brown sugar.
3. Bring to a boil. Reduce heat, cover, then simmer for anywhere from ten minutes to several hours (the longer it simmers the richer the flavor).
4. Just before you're planning to eat it, cook the elbow macaroni according to the package directions. Then add them to the chili mixture. (If you add the macaroni to the chili mixture earlier in the process, the noodles will soak up all of the water and end up overdone.)

Serve with oyster crackers, Saltines, or rye bread. Mmmmmm!

Read more...

Monday, February 2, 2009

Super Bowl Sunday

I've discovered what it takes to make football interesting for me.

Money.

NavyGuy and I went to a Super Bowl party tonight. Another flight student in his class was hosting a party at his house, and as we're always up for chicken wings a good time with friends, we headed over there to watch the game. Part of the fun of the night revolved around a pool that everyone threw money into. NavyGuy and I had awfully terrible numbers (the pool was based on numbers in the teams' scores at the end of each quarter), but as the fourth quarter neared an end, we were in position to win the big prize! Suddenly, I was inappropriately interested in whether or not the Steelers scored again... as opposed to previously when I was only interested in the commercials (which by the by, stunk hard core this year). Sadly, the stupid Steelers did manage to score again, snatching a twenty dollar prize away from me.

Still a good party though (despite NavyGuy's near coronary at the poor calls by the refs). I brought the infamous Beer Dip, a recipe that Historygirlie gave me a few years ago. It has become a staple of all festivities and gatherings ever since, and NavyGuy will dip almost anything into it (chips, pretzels, veggies, chicken wings, napkins, etc.). It's too tasty not to share the recipe:

HistoryGirl Beer Dip
Mix all of the following ingredients (I use a hand mixer to make sure it's super smooth): two regular size packages of cream cheese, one packet of ranch dressing mix, 1/2 a can of beer, and a little bit of shredded cheese. That's it! Refridgerate (it's excellent the second day because the beer has soaked in more), and eat with pretzels or crackers.

Read more...

Monday, January 26, 2009

Recipe: Winter Veggie Soup

Doesn't this look delish? I bought the ingredients to try this recipe last week, and just never got around to it. It made for a tasty lunch today though!


Winter Vegetable Soup

Ingredients:
  • 1/2 cup sliced green onions
  • 1 tablespoon vegetable oil
  • 1 can (14-1/2 ounces) chicken broth
  • 1 small potato, peeled and cubed
  • 1 large carrot, sliced
  • 1/4 teaspoon dried thyme
  • 1 cup broccoli florets
  • 1/4 teaspoon salt, optional
  • 1/8 teaspoon pepper

Directions:

In a medium saucepan, saute onions in oil until tender. Add the next four ingredients; bring to a boil. Reduce heat; simmer, uncovered, for 5 minutes. Add the broccoli, salt if desired and pepper; simmer, uncovered, for 7 minutes or until vegetables are tender.

It took me about thirty minutes from start to finish (I chop pretty slowly). Best part of this recipe? The portions described above are just enough for two people - so no leftover soup for weeks on end. Of course you could double or even triple the recipe if you wanted to, but we hate leftovers here, so one serve meals rock. I also used low-sodium chicken broth/stock to make it slightly healthier.

Read more...

Wednesday, January 14, 2009

Let Them Eat Cake!

Drooling yet?

And my sister wondered what in heavens name I would do with a cake dome... (thanks for the bridal shower gift!!)

NavyGuy ate 1/4 of it within twenty minutes of it being frosted. I think it's the pink frosting that won him over. (Yes, I made the cake. Yes, it was a Betty Crocker box mix. Yes, I've made my piece with it.)

Read more...

Tuesday, January 13, 2009

Recipe: Quiche

Another successful venture in the kitchen! Last night's mission: basic quiche. I had grabbed a recipe out of last month's Real Simple magazine, and finally realized that quiche was actually quite simple! (And, a great use for leftover refrigerated pie crusts that I stocked up on for Thanksgiving and never ended up using.) Aside from the cheese that this recipe calls for, the ingredients are pretty cheap, and it filled both NavyGuy and I up without needing anything else for supper.

The recipe can be found here, but I'm going to give my version as well as some notes.


Basic Quiche - Ingredients
- 1 9 inch refrigerated piecrust (any brand works; they usually come two in a box so just freeze the other one for later use)
- 2 medium onions, chopped (I used one big one and it seemed to be enough)
- 1 cup fresh flat-leaf parsley, chopped (I didn't measure this either, just chopped up a bunch and kept adding until the mixture looked "green" enough)
- 4 large eggs
- 3/4 cup half-and-half (I used fat-free)
- 1/8 teaspoon ground nutmeg (totally forgot to buy this, so I substituted "one shake" of pumpkin pie seasoning - hey it has nutmeg in it! no complaints from anyone)
- 8 oz. , approx. 2 cups, Gruyere, grated (fancy cheese is expensive! from my online search, I found you could substitute Jarlsberg, Emmantaler, or plain old Swiss. I used Jarlsberg which was still more than I'm used to paying for Kraft cheese slices, but just use what you can find at the store - it's not going to make that much of a difference in terms of taste unless you're a cheese snob)
- salt and pepper
- oil to cook the onions

Directions
1. Heat oven to 375. Fit the piecrust into a 9-inch pie plate. Place on a baking sheet. (You totally don't need one of the fancy quiche/tart pans like is in the photo above - I used a regular pie pan, or you could probably even get away with a round cake pan. I sprayed the pan with Pam so the crust wouldn't stick.)

2. Cook the onions in oil over medium-low heat in a skillet, with a little salt and pepper thrown in. Stir occasionally for 5-7 minutes until onion is soft. (My onions were in the pan for a good 15 minutes because it took me longer to grate the cheese than expected. No harm, no foul.) Stir in the parsley.

3. In a large bowl, whisk the eggs, half-and-half, nutmeg, and 1/4 teaspoon salt. Stir in the onion/parsley mixture, and the grated cheese.

4. Pour the egg mixture into the crust. Bake until a knife inserted into the center comes out clean, 35-40 minutes. (Mine needed 40 minutes.) Let sit for 5 minutes before serving.

It was awesome - this is now a go-to recipe for me if I need a nice brunch item, or just a quick dinner. Now that I know better how to grate cheese, I could probably do all the prep in less than 20 minutes. You can also jazz it up by adding other vegetables (asparagus, spinach, mushrooms) or meat (diced ham) - it's basically a fancier omlete, so I assume anything that works in an omlete, can probably be added to a quiche!

Let me know if you try it out or have any other variations or tips for this recipe!

Read more...

Thursday, January 8, 2009

Recipe: Corny Chicken Wraps

First new recipe of 2009! It comes from a new cookbook my mom got me for the bridal shower - Taste of Home Busy Family Cookbook.

Corny Chicken Wraps (love the name!)

2 cups cubed cooked chicken breast
1 can (11 ounces) whole kernel corn, drained
1 cup salsa
1 cup shredded cheddar cheese
8 flour tortillas (the 6 inch kind), warmed

(I used three chicken breasts that I had thawed, and just chopped them up into pieces, and cooked them in a skillet on the stove with some Pam, before adding the other ingredients.) Combine the cooked chicken, corn, and salsa. Cook over medium heat until heated through.

Sprinkle cheese over tortillas (I warmed them in the oven first by just pre-heating the oven to a random temperature and wrapping them up in some aluminum foil). Add the chicken mixture on top of the cheese, roll, and chow down! NavyGuy was suspicious at first, but a few bites won him over. I like that it's a little different than just a regular taco, yet still has a good taste, and is probably healthier. The corn gives it a nice crunch. We had a basic bag salad on the side.

Thanks for the cookbook Mom! It's already saved us from frozen pizza once :)

Read more...

Monday, December 15, 2008

Winter Food

Some foods, are only appropriate in the winter. They don't taste right unless there's a chill in the air and snow on the ground. Example #1 - chili.

As a kid, we used to have chili in these big gray bowls with handles, and my sister and I would spend time removing all (ALL) of the beans from the dish, before we'd even dare to put a spoonful in our mouths. On the side, we'd either have rye bread or oyster crackers. Now that I'm a grown-up making my own chili, I just leave the beans out and save myself the headache.

Tonight was chili night. We finally have snow here, so chili can be properly eaten. I make the Wisconsin version - with elbow macaroni - yum, yum, yum. NavyGuy ruined his with shredded cheese and sour cream, but he'll learn.

Other "winter-only" foods on my list? Hot chocolate and beef stew. Any foods you reserve for a specific time of year?

Read more...

Monday, November 17, 2008

T-Day Prep: Day 10

Two more items checked off the list - mashed potatoes and one dessert.

I know mashed potatoes are super easy, but I've never made them before, so I wanted to make sure there weren't any hidden obstacles (like say, an inability to peel potatoes or something). Lo and behold, I don't need to worry about any of that, because NavyGuy (aka mashed potato dictator) pulled off a non-violent coup d'etat in the kitchen last night and took power of the mashed potato making. I merely asked him to help peel potatoes because I was falling behind, and next thing I know - he's complaining about my attempts to drain the potatoes, fretting over the fact that they aren't "done" enough, and wielding the masher like a weapon! Oh, and I dared to use milk instead of heavy cream, AND I like my mashed potatoes with a few lumps left in for texture (as opposed to the liquidy, beaten-within-an-inch-of-their-life, baby food consistency that NavyGuy prefers). So, now that I haven't practiced making mashed potatoes, NavyGuy is going to have to leave his deep fried turkey long enough to come help with the starch. Good grief. We had a nice division of labor going on (Adam Smith would have been eternally proud), but now the whole system has gone to pot.

At least my dessert turned out splendid. One of my cousin's made a heavenly apple crisp at Thanksgiving last year; determined to find an easier way to make it though, I abandoned her honest to goodness homemade recipe and searched for something that would save me time and energy, while not sacrificing too much taste.

Voila! I present, Easy Apple Crisp (and after further intenet searching - Even Easier Apple Crisp!).

Ingredients
- 4-5 medium baking apples (I have no clue which apples are "baking" - I bought the ones on sale at the store. They were redish-greenish, and tasted good.)
- 1 T lemon juice
- 2 T granulated sugar
- 1 T flour
- 1 t ground cinnamon
- 1 pkg oatmeal raisin cookie dough (the package of frozen stuff)

Directions
1) Preheat oven to 325 F. Spray 8 in baking pan with nonstick cooking spray.
2) Peel, core, and slice the apples. (My process - carefully peel with a sharp knife, then use an apple slicer to cut each into 8 pieces, then use the knife to slice each of the pieces smaller.)
3) Combine all of the ingredients except the cookie dough in a large bowl. Then put the apple mixture into the baking pan.
4) Crumble the cold cookie mixture on top. (I added a little more cinnamon on top just to make it fancier :).
5) Bake for 40-45 minutes. Serve warm or at room temperature.

I love this recipe because I looooove apple crisp, but making the mixture and the topping from scratch is just too much work. So, cheating and using the premade dough is a lifesaver. It tasted amazing - I served it with vanilla ice cream. You could also add caramel sauce to put it over the top :) [Recipe from Christine Moore, Little Flower Candy Co., Pasadena]

Read more...

Monday, November 10, 2008

T-Day Prep: Day 17

Today's mission: test drive maple glazed carrots.

Results: moderate success.

So apparently, creating a glaze for vegetables is not as easy as Real Simple magazine would have you believe. I have listed the recipe and directions below, because it is good (and relatively simple), but I've added my own comments and tips where necessary, to save other novice cooks from suffering as I did.

Maple Glazed Carrots - Real Simple.com

3 pounds carrots, sliced 1/4 inch thick on the diagonal
1/4 cup maple syrup
2 tablespoons unsalted butter
Kosher salt and black pepper

In a large skillet, combine the carrots, syrup, butter, 1/3 cup water, 1/2 teaspoon salt, and 1/4 teaspoon pepper. I didn't use a full 3 pounds of carrots, so I can't vouch for the proportions.

Bring to a boil. Reduce heat and simmer, partially covered, stirring once, until the carrots are tender and the liquid has reduced to a glaze, 12 to 15 minutes. (If the carrots are tender before the liquid has thickened, uncover, increase heat to medium-high, and cook until the liquid forms a glaze.) I followed these directions exactly, and the liquid had not reduced to a glaze whatsoever after 15 minutes. The carrots weren't to the point of mush, so I upped the heat a lot and stirred continuously. This was based on my quick research in my Joy of Cooking book. After about five more minutes, the liquid had thickened enough to satisfy me.

So, despite my glazing difficulties, the recipe was a success - and will be showing up on our Thanksgiving buffet! :)

Read more...

Monday, November 3, 2008

T-Day Prep: Day 23

Today's menu taste test was a sweet potato recipe. I, not being a fan of the item in question, went searching for a sweet potato recipe that might make me a believer. NavyGuy loves sweet potatoes - loves them - so I needed something that would meet high standards.

Sadly, my first attempt will not be showcased on the T-Day buffet. I found this recipe on allrecipes.com, for pineapple sweet potatoes (doesn't it look yummy?). All of the reviews made it sound easy and delicious, plus I already had most of the necessary ingredients. However, after a trip through Safeway, I realized I had absolutely no clue what a sweet potato looked like; I thought they were orange, but the only ones I found in the produce section looked yellow when I "accidentally" snapped one in half. Everything orange colored was labeled a yam, and in stupid decision number eight for the day, I didn't think to consult with one of the nice produce guys restocking lettuce to find out whether yams were just another name for sweet potatoes.*

Well, long story short, the recipe did not work. The yellow sweet potatoes did not soften up enough in the oven, so I ended up taking them out of the oven after the required cooking time and mashing them up with the pineapple and brown sugar sauce. NavyGuy, Roomie #2, and myself all vetoed it, though Roomie #1 declared it delicious and preceeded to eat as much of it as possible (straight out of the glass Pyrex dish by the way), so I guess 1 out of 4 ain't bad. However, as NavyGuy is such a fan of the weird vegetable, I am determined to figure out a way to make them edible. [Photo: (left) orange sweet potatoes, (right) yellow sweet potatoes)]

I can't bear to peel another batch of sweet potatoes already tomorrow though, so next up is a maple glazed carrot recipe from this month's Real Simple. Wish me luck!

*After extensive internet research and consultation with my Joy of Cooking book, I have unearthed the following information: there are two varieties of sweet potatoes. Say what?!? Yellow sweet potatoes are drier, orange sweet potatoes are eroneously called yams in North America (so my confusion at the grocery store today was TOTALLY not my fault in the least). Orange sweet potatoes are sweeter than the yellow variety, so they're much more common. True yams are more often found in Latin American and the Caribbean; they have purple or red flesh, and can grow to as large as seven feet long! So, in short - if you want to make a sweet potato recipe, you will probably need to buy what's labeled "yams" in the grocery store. Lesson learned. You're wlecome.

Read more...
Blog Widget by LinkWithin

  © Blogger templates The Professional Template by Ourblogtemplates.com 2008

Back to TOP